
Table of Contents
Have you ever thought about space? Despite having a small bathroom with little enough space to cater for a toilet and sink. Hesitation is not the answer; in this article, we will give you tips on how to install a wall-mounted sink.
For the period of this Covid 19 pandemic outbreak where you’ll be carrying out your tasks distantly devoid of any technician nearby to assist, this article is going to give you great steps on how to install a mounted sink. But before we jump to a conclusion, please note that wall-mounted sinks are usually heavy in weight, and require substantial backing. Without wasting much of your time, I’ll detail you about a mounted sink, which is the best choice for everyone who wants to create space in their homes.
Tools and Materials Required To Install Sink
To start installing a wall-mounted sink, it is recommended that you have all the required tools and materials, which may vary from home to home. Therefore, a great idea for appropriate mounting hardware is needed you can usually purchase in hardware stores. Below is a list of tools and materials needed: Crescent wrench, p-trap, basin wrench, level, dear, stud finder, mounting hardware, screwdriver, pencil, and slip-joint pliers.

Steps of Installing a Wall-Mounted Sink
After arranging your tools and materials, it’s now the right time to mount your wall sink. Below are steps on how to install a wall-mounted sink:
Step 1: Preparation for Installing the Sink
Before installing a sink, the first thing is to check your wall if it’s still in good shape. If your wall is scraped with pipes quickly, some drywall replacement is immediately required. In most cases, all setting up procedures can be determined by the conditions of the wall. Measure the size of your sink and determine its height (in most cases, a plumber usually requires about 30 inches from the floor for a certain sink, but this can differ due to the owner’s preference and the size of the sink).
Put a mounting plate in a location where you want to install your sink and take a pencil to mark the wall on the holes on that mounting plate. Usually, most sinks come up with what we call a roughing sheet, which gives guidelines for water and waste lines, sometimes even wall peg height. Before purchasing the sink and faucet, it is the wisest way to check if the roughing sheet is available. You can also source this information online. Ensure that the main water supply is turned off, then open up a tap in another room to release pressure.
If you do not have a mounting plate, you can use those holes that originated on your sink bowl as your model/template. During this step, a stud finder is used to find and mark the wall studs’ location. Despite having difficulties with the wall studs not line up to your sink’s mounting position, wood blocking is then installed in between the wall studs.
Step 2: Drilling the Sink
For this step, you take your drill, then carefully mount those marked holes for the anchor or bolts using the instructions noted in step 1.
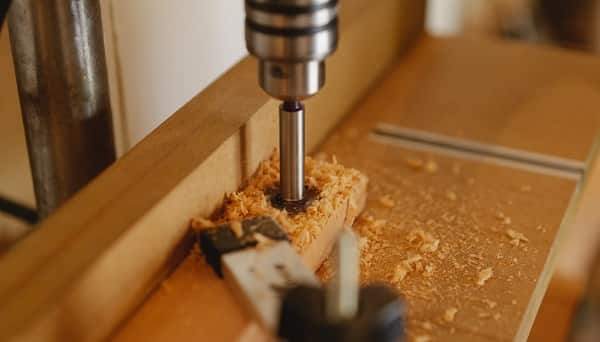
For further securing the sink or metal mounting plate, use lag screws and fasteners. It is recommended to ensure the mounting plate with those anchor bolts. Make sure or check that the sink or mounting plate is level before driving the second fastener. Please carefully note that if the wall is tile, it is best to use a masonry bit drill and a smaller twist for drilling into the support.
Step 3: Attaching Spout, Drain Assembly & Mounting the Basin
You can attach the new spout/tap and a drain assembly to your sink. The spout/tap should be inserted into the sink and should be attached with locknuts hereto. In most cases, it’s advantageous to install the sink bowl before mounting the basin first. Hand tightening the mounting nuts will allow a faucet position; this is usually done before tightening it.
For the draining assembly, I recommend you use a plumber’s putty nearby the drain extension, steadfastly press it into the location over the drain hole, and safeguard the assembly point by positioning the seal and coupler nuts. If the spout/tap and a drain assembly are in place, you must mount the bowl onto the wall. First, attach the drain tailpiece to the drain nipple through the base. At this stage, you need someone to help you on hand to make sure that the sink doesn’t fall when making connections.
Tighten the joints firmly by using slip-joint pliers. The remaining P-trap can be installed to the drain’s tailpiece at an actual height. Measurements and marking of the P-Trap are required to ensure that the bottom of the P-Trap is fit once the pedestal is intact in its rightful place. For P-Trap’s threads, use the plumber’s tape and further make connections to it. By using your hands, tighten the nuts, and continue to use pliers. Position the drain bars through the hole and attach an extension lead with a screw provided with your kit.
Like we have said before if you do not have the mounting plate, the best way is to directly attach the sink to the wall using any mounting hardware. Note that most of the wall-mounted sinks usually come with a trim piece, which usually hides plumbing lines, therefore, attach directly to the wall mounting with lag screws.
Step 4: Connecting Water Supply & Drainage Lines
After attaching the mounted sink, it’s now time for you to connect the water supply for the tape and drainage lines. Prepare water inlet valve nipples by covering thread seal tape around them. Cut two water supply valves using an adjustable wrench. Alignment of the tube to taps is required to connect the nipple to the spout. This should be done to other water supply lines. Turn on the water supply inlets to test the spout and the drainage system of the sink.
A spout has an aerator and a filter, which is needed to avoid debris; these need to be removed and should be replaced later after a test run of water of about 1 to 2 minutes—rechecking of leakages and when aerator and a filter is needed after a replacement is done. Removing After completion, test your water supply or sink bowl for any water leakages which can occur.
Final Verdict
In this article, I have provided all answers on how to install a wall-mounted sink. It’s now your time to go to any preferable local hardware store to buy your tools and hardware to install your mounted sink. Additionally, after installation, I recommend maintaining your sink by regularly cleaning with the use of chemical liquids essentials such as gems killers and other cleaning agents to keep it shiny and germ-free.